How to Rebuild a Graco Mark IV / Mark V Pump — Complete Guide
July 06, 2026 • 7 min read
Quick Answer
Rebuilding a Graco Mark IV or Mark V pump involves replacing the inlet valve seat (239922), outlet valve assembly, upper and lower packings, throat seal, and all o-rings. The process takes 60–90 minutes and requires a packing wrench (218203), a torque wrench, and TSL. Always confirm your exact model number before ordering parts — many Mark IV and Mark V components are not interchangeable. Call us at 713-931-4102 for a free part number confirmation.
The Graco Mark IV and Mark V are both heavy-duty contractor airless sprayers, but there are meaningful differences that affect which parts you order:
Graco Mark IV
Older generation pump design
Cylinder thread pitch differs from Mark V
Uses separate piston and cylinder components
Lower-pressure connecting rod design
Parts availability: some components discontinued
Still very rebuildable with correct kit
Graco Mark V
Updated pump with improved seal geometry
Higher cycle efficiency — longer packing life
Updated connecting rod with heavier duty pin
Some parts compatible with newer 390/490 series
Wider parts availability
More common in the used market today
Do not cross-order parts between Mark IV and Mark V without confirming compatibility. The packing assemblies, cylinder threads, and valve seats differ between models. Always provide your full model and serial number when ordering. Call us at 713-931-4102 — we verify compatibility before every sale.
2. Parts & Tools Needed
Item
Part Number
Notes
Packing Repair Kit — Mark IV
218-508
Confirm with serial number
Packing Repair Kit — Mark V
218-770
Confirm with serial number
Inlet Valve Seat
239922
Replace at every service — mandatory
Throat Seal Liquid (TSL)
TSL
Essential — fill throat before and after
Packing Wrench
218203
Required tool
Connecting Rod Pin
Model specific
Inspect and replace if worn
Cotter Pin
Model specific
Always use a new cotter pin on reassembly
Torque Wrench
—
Required for pump cylinder torque
3/4" + 1" Wrenches
—
For valve seats and cylinder
3. When to Rebuild the Mark IV/V Pump
15-second cycling test fails: Pump cycles more than every 15 seconds at rest with gun trigger locked and no external leaks
Pressure loss under load: Pressure drops significantly when spraying vs at idle
Paint or TSL leaking from throat: Visible fluid dripping from the packing area around the displacement rod
Pump runs but no output: Combined with visible external leaks suggests valve failure
Preventive rebuild: Every 12 months on a commercial crew running the machine 5+ days per week
4. Step-by-Step Pump Rebuild
1
Depressurise, Flush & Drain
Set prime/spray valve to PRIME. Trigger gun to release all pressure into waste container. Turn off and disconnect power. Engage trigger lock. Flush pump with compatible solvent — run until clean. Drain completely.
⏱ ~10 min
2
Remove Cotter Pin & Connecting Rod Pin
Locate the cotter pin at the connecting rod. Straighten and remove using needle-nose pliers. Slide out the connecting rod pin to disconnect the pump rod from the drive mechanism. Discard the old cotter pin — always use a new one on reassembly.
⏱ ~8 min
3
Remove the Pump Cylinder
Using a 1-inch wrench (or strap wrench for tight cylinders), unscrew the pump cylinder counterclockwise from the fluid housing. Pull straight out. Be careful — residual fluid may drain from the cylinder bore. Have rags ready.
⏱ ~10 min
4
Remove & Replace Inlet Valve Assembly
Unscrew the inlet valve housing. Remove the old ball, spring, and seat (239922). Inspect the housing for wear or corrosion. Install new inlet valve seat, spring, and ball from your kit. The 239922 seat must be replaced at every service — do not reuse.
⏱ ~10 min
5
Remove & Replace Outlet Valve Assembly
Unscrew the outlet valve housing (counterclockwise). Remove old ball and seat. Clean the bore with solvent. Install the new outlet valve assembly from your kit — ensure the ball seats fully before tightening the housing.
⏱ ~8 min
6
Replace Packings & Throat Seal
Using packing wrench (218203), remove the packing nut. Extract old upper PTFE packings and lower leather packing. Inspect the bore for scoring. Install new lower leather packing first (flat side toward pump). Stack new upper PTFE packings flat-side up. Tighten packing nut — snug only, never overtighten. Install new throat seal. Fill throat cup with TSL.
⏱ ~15 min
7
Replace All O-Rings
Clean all o-ring grooves. Lightly lubricate each new o-ring with TSL before installing. Seat each ring fully — twisted o-rings will leak immediately under pressure.
⏱ ~8 min
8
Reinstall Pump Cylinder
Thread the pump cylinder back into the fluid housing by hand first to avoid cross-threading. Torque to specification (see torque table below). Do not overtighten — this is a common mistake that damages threads.
⏱ ~8 min
9
Reinstall Connecting Rod & New Cotter Pin
Align the pump rod with the connecting rod eye. Insert the connecting rod pin. Install a brand new cotter pin and bend both legs. Never reuse a cotter pin — failure under load can cause catastrophic pump damage.
⏱ ~5 min
10
Prime, Test & Perform Cycling Test
Reconnect power. Set pressure to minimum. Prime the sprayer — pressure should build within 3–4 strokes. Increase to working pressure. Perform 15-second cycling test. If the pump holds pressure for 15+ seconds with trigger locked, the rebuild is successful.
⏱ ~8 min
5. Torque Specifications
Mark IV / Mark V Torque Reference
Pump cylinder to fluid housing75–85 ft-lbs
Outlet valve housing50–55 ft-lbs
Inlet valve housing45–50 ft-lbs
Pump housing bolts18–20 ft-lbs
Packing nutSnug — hand tight + 1/4 turn
Torque specs above are general references for the Mark IV/V family. Always cross-reference with the specific Graco instruction manual for your model (available free at graco.com). Call us if you need help locating the right manual for your serial number.
Need Mark IV or Mark V Pump Parts?
Call us with your model and serial number — we'll confirm the exact kit before you order. In stock, ships same day.
Common kits are the 218-508 (Mark IV) and 218-770 (Mark V), but there are several variants depending on the specific model suffix and build year. Always confirm with your model and serial number before ordering. Call 713-931-4102 — we verify compatibility on every order at no charge.
Expect 60–90 minutes for a first-time rebuild, and 30–45 minutes if you've done it before. The connecting rod disassembly adds time compared to a 390/395 rebuild. Our technicians are available to walk you through it live over the phone.
The Mark V is an updated design with improved seal geometry and a heavier-duty connecting rod. Many parts are not interchangeable between the two models — always confirm your model before ordering. The cylinder thread pitch differs, so cross-fitting a cylinder is a serious risk.
Yes, a confident DIY user or experienced contractor can absolutely rebuild a Mark IV/V pump with the right tools and this guide. The main risks are cross-threading the cylinder and overtightening the packing nut. Take your time, use a torque wrench, and call us at 713-931-4102 if you get stuck at any step.
Check the following in order: (1) Is the inlet valve seat (239922) new? A reused seat is the #1 cause of repeat failure. (2) Is the displacement rod scored? Run your fingernail down it. (3) Are all o-rings correctly seated and untwisted? (4) Is the packing nut overtightened? Overtightening compresses packings flat and prevents proper sealing. Call us for a free phone diagnosis.
Graco Mark IVGraco Mark VPump Rebuild218-508218-770239922Packing KitConnecting RodTSL
Pro tip: Never reuse the old rod seal or throat packings during a rebuild. The labour is the same — the parts cost is small. Fresh seals mean another 2–3 years before the next rebuild.
We use cookies to keep your cart working, understand how the site is used, and
measure which campaigns bring customers to us. You can turn off anything that
isn't essential.
Cookie preferences
Strictly necessary
Required for the site to work — your shopping cart, staying signed in, and security checks. These cannot be turned off.
atp_session_id, PHPSESSID, csrf
Always on
Functional
Remembers your preferences, such as saved favourites and recently viewed parts.
wishlist, recently viewed
Analytics
Helps us see which pages and products people use, so we can improve the site.
sp_visitor
Marketing
Records which search engine, ad or link brought you here, so we know which campaigns are worth running.
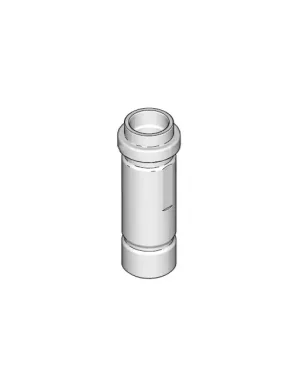 −27%
−27%
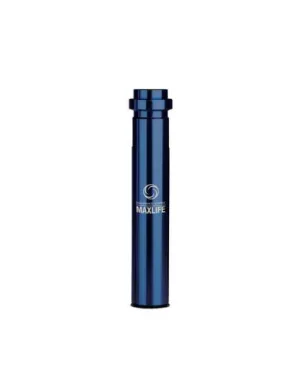 −28%
−28%