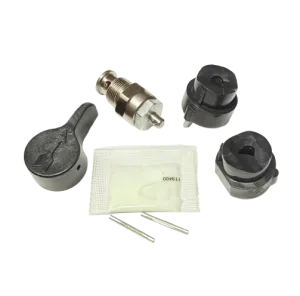
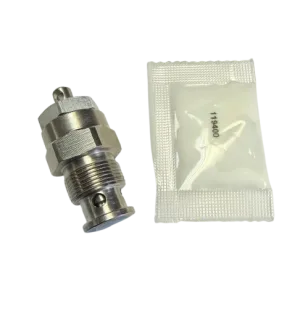
If paint dribbles from the drain tube while the valve is turned to SPRAY, the prime valve is leaking and should be replaced. On the Graco 190, 210, 390 and RentalPro 210 the part is drain valve kit 235014, and the same kit fits Magnum-class sprayers such as the LTS 15 and LTS 17. The 490, 495, 595 and 650 PC use kit 239914. Relieve pressure, drive out the handle pin, unscrew the old valve, fit the new seat and gasket, and tighten to the torque Graco lists: 120 to 130 in-lb on the 390 family.
- A leaking prime valve returns paint to the pail, so the pump runs more and the fan gets weaker. It is often mistaken for worn packings.
- Two kits cover most machines: 235014 for the 190, 210, 390 and Magnum-class units, 239914 for the 490 to 650 PC family.
- The seat and seat gasket come out with the valve. If the old seat stays behind in the manifold, the new valve will not seal.
- A Magnum prime valve that opens by itself is doing its second job as a pressure relief. That points to the pressure control, not the valve.
- Signs the Prime Valve Is the Problem
- Which Valve Kit Fits Your Sprayer
- Tools and Supplies
- Relieve Pressure Before You Touch the Valve
- Replacing the Valve, Step by Step
- Replacing the Drain Tube While You Are There
- Test the Repair Before You Paint
- Mistakes That Bring the Leak Back
- Notes by Sprayer Family
- Frequently Asked Questions
The prime valve is the small lever on the side of the sprayer that you turn down to prime and forward to spray. Graco manuals call it the drain valve or the Prime/Spray valve, and it does two jobs. It gives the pump an easy path back to the pail while you prime, and it lets you dump pressure safely when you stop.
Inside is a small seat that has to hold back up to 3300 psi every time you spray. Paint is abrasive, and a flake of dried material caught on that seat is enough to start a leak. Once it leaks, part of every pump stroke goes down the drain tube instead of out of the gun.
1. Signs the Prime Valve Is the Problem
A worn prime valve does not fail suddenly. It gets a little worse each job, and the symptoms look a lot like a tired pump. These are the ones that point at the valve.
Paint runs from the drain tube while spraying
With the valve turned forward to SPRAY, a steady dribble or a thin stream comes out of the drain tube into the pail.
What it means: the seat is worn or has debris on it. This is the clearest sign, and it is the first thing Graco tells you to check when output is low.
The pump will not stop when you release the trigger
The motor keeps ticking over, or restarts every few seconds, with the gun closed.
Check first: hold the drain tube over an empty cup. If paint collects, the valve is the leak. If the tube stays dry, read our guide to running a stall test, because the leak is inside the pump.
Pressure is low and the fan has tails
A new tip does not help and the pump seems to work harder than it used to.
Likely cause: paint is bypassing through the valve. Rule this out before you buy a packing kit. Our post on a Graco sprayer that loses pressure mid-job covers the other causes.
On Magnum-class sprayers the Prime/Spray valve also acts as a pressure relief. If it snaps open by itself and dumps paint down the prime tube, Graco's troubleshooting chart says the system is over-pressurizing. The cause is the pressure control switch or the control board, so a new valve will not cure it. See how to test a Magnum pressure control switch.
2. Which Valve Kit Fits Your Sprayer
Graco uses only a few prime valves across a very large range of sprayers. Match your model to the table, then confirm against the parts page of your own manual. You will find the manuals we host in the manuals library.
| Sprayer family | Drain valve kit | Handle | Base | Pin |
|---|---|---|---|---|
| 190 Classic, 210, 390, RentalPro 210, RentalPro 230ES | 235014 | 187625 | 224807 | 111600 |
| LTS 15, LTS 17 and the Magnum X5, X7 platform | 235014 | 187625 | 24E578 on later series | 111600 |
| GX 19 stand models 17H211 and 17H214 | 235014 | 187625 | 224807 | 111600 |
| 490 PC, 495 PC, 595 PC, 650 PC Pro | 239914 | 187625 | 224807 | 111600 |
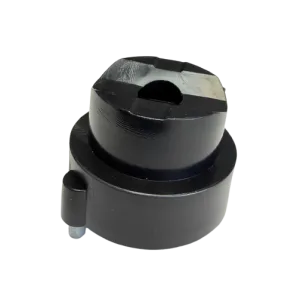
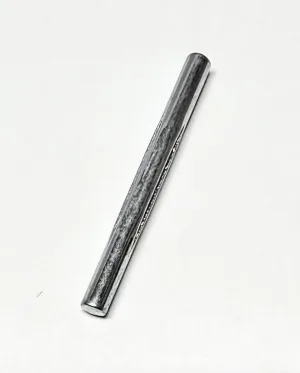
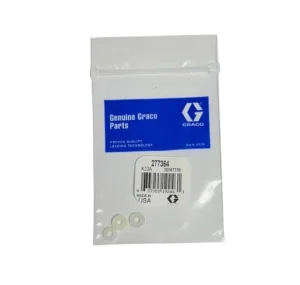
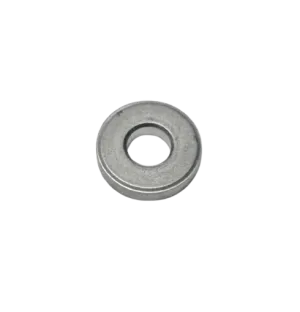
Kit 239914 comes with its own seat gasket (277364) and valve seat (15E022). Kit 235014 also includes a new seat and gasket. In both cases the handle, base and pin are separate parts, and you can reuse them if they are not cracked or bent.
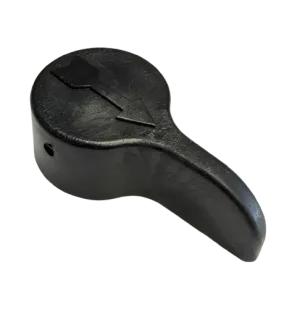
If your handle spins loosely or the pin has worked out, a new handle and pin may be all you need. If paint is coming down the drain tube, the valve itself is finished.
What about the drain tube
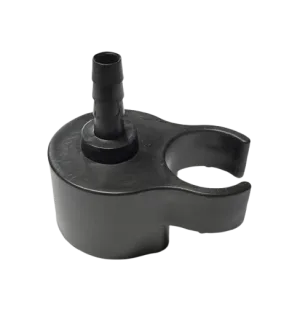
While the valve is out, look at the drain tube and the barbed diffuser on its end (244035). A tube that has gone stiff and cracked sprays paint around the pail every time you prime. Replacing it takes two minutes and is covered below.
3. Tools and Supplies
Nothing special is needed, but a torque wrench that reads in inch-pounds makes the difference between a valve that seals and one that strips the manifold.
- A small hammer and a pin punch, or a nail with the point filed flat
- A wrench that fits the hex on the valve body
- A torque wrench that reads in inch-pounds
- A pick or a small screwdriver for lifting out the old seat
- A flashlight, clean rags and a waste pail
- Water or the correct flushing fluid to rinse the manifold port
4. Relieve Pressure Before You Touch the Valve
Switch the sprayer off and unplug it. Turn the prime valve down to PRIME, then hold the gun against the inside of a waste pail and pull the trigger until nothing comes out. Set the trigger lock. Leave the valve in the PRIME position. Fluid under airless pressure can pierce skin, and Graco treats that as a surgical emergency, so never loosen a fitting on a machine that might still be charged.
If you suspect the hose or tip is blocked and pressure is trapped, loosen the hose coupling very slowly, a fraction of a turn at a time, and let the pressure bleed off before you undo it fully.
It also helps to flush the sprayer first. A valve full of wet paint is slippery and hides the seat, and you do not want paint running into the manifold port while it is open.
5. Replacing the Valve, Step by Step
These steps follow Graco's repair instructions for the 390-class sprayers. The 490 to 650 PC family and the Magnum-class units come apart the same way.
- Drive out the handle pin
Support the handle with one hand and tap the grooved pin through with the punch. It is a tight fit by design. Keep the pin if it is straight.
- Pull off the handle and the base
The handle slides off the valve stem, followed by the round base behind it. Note which way the base faces so it goes back the same way.
- Unscrew the valve from the manifold
Put the wrench on the hex and turn counterclockwise. Expect a little paint or flushing fluid to run out as the threads let go.
- Remove the old seat and gasket
This is the step people miss. The valve seat and the thin seat gasket either come out on the end of the valve or stay inside the manifold. Shine a light into the port and lift them out with the pick if they are still in there.
- Clean the port
Wipe out dried paint and rinse the threads. Any grit left on the sealing face will sit under the new gasket and leak.
- Fit the new gasket and seat to the new valve
Place the seat gasket and then the valve seat on the end of the new drain valve, as supplied in the kit.
- Screw the valve in and torque it
Start it by hand so it does not cross-thread, then tighten. On the 390 family Graco specifies 120 to 130 in-lb. For Magnum-class sprayers the repair manual gives 130 to 180 in-lb. On the 490 to 650 PC, use the figure on the control box page of your manual.
- Refit the base, handle and pin
Push the base over the valve, then the handle over the base, line up the holes and install the pin. Graco notes that you may need to tap it fully home with a hammer.
The valve body threads into an aluminum manifold. Too loose and paint weeps past the gasket. Too tight and you can damage the threads in a part that costs far more than the valve. If you do not own an inch-pound torque wrench, this is a good reason to borrow one.
6. Replacing the Drain Tube While You Are There
On the 390-class sprayers the drain line pushes onto a barbed fitting in the manifold. Cut the old line off the barb, and unscrew the fitting only if you are replacing it too. If you are reusing the fitting, clean the remains of the old tube off the barbs.
Push the new tube on by hand. Graco's own tip is to warm the end with a hair dryer, or dip it in hot water for a few seconds, so it softens and slides over the barbs. Refit the clamp if your model has one, and make sure the diffuser on the far end points down into the pail.
7. Test the Repair Before You Paint
Do not go straight back to the job. A two-minute test with water tells you whether the new valve is sealing.
- Put the suction tube and drain tube in a pail of clean water and prime the pump with the valve down.
- Turn the valve forward to SPRAY, turn the pressure up and trigger the gun into the pail until the flow is steady.
- Release the trigger. The motor should stop within a moment and stay stopped.
- Watch the end of the drain tube for a full minute. It should stay dry.
- Look at the valve body where it meets the manifold. There should be no weep around the threads.
If the tube still drips, relieve pressure and take the valve back out. The usual reasons are an old seat left in the port, a gasket that folded on the way in, or grit on the sealing face.
If the tube is dry but the pump still will not hold pressure, the valve was only part of the story. The next places to look are the pump's intake and piston valves and the packings. Our guide to a Graco sprayer that will not shut off walks through that in order.
8. Mistakes That Bring the Leak Back
- Leaving the old seat in the manifold. Two seats stacked on top of each other cannot seal.
- Using thread tape as a fix. The seal is made at the seat and gasket, not on the threads.
- Forcing the handle to stop a drip. Leaning on the lever bends the pin and wears the seat faster.
- Storing the sprayer with paint in the valve. Flush until the drain tube runs clear and finish with storage fluid. The routine is in our winterizing guide.
- Skipping the strainer. Unstrained paint carries the grit that cuts valve seats. Keep the inlet strainer on and clean.
9. Notes by Sprayer Family
190, 210, 390 and RentalPro 210
The valve screws into the fluid manifold next to the pressure control. Access is easy with the sprayer standing on a bench. Parts for this family are in our Graco 390 parts section.
Magnum-class sprayers
The valve threads into the pump housing itself. Graco's chart for these machines says to check the valve for debris trapped on the seat before condemning it, so rinse and inspect it first. Diagrams for these units are on our X5 and LTS 15 and X7 and LTS 17 pages.
490, 495, 595 and 650 PC
The valve sits on the filter manifold under the control box, and the kit is 239914. While you are there, pull the manifold filter and clean it. The full breakdown is on the 490 PC control box parts page.
Not Sure Which Prime Valve Your Sprayer Takes?
Send us the model and series from the ID tag and we will match the valve kit, handle and base before you order.
Ask Our Parts Team Call +1 713-931-4102Prime Valve Parts for Graco Sprayers
10. Frequently Asked Questions
How do I know if my Graco prime valve is bad?
Turn the valve to SPRAY, build pressure and watch the drain tube. A good valve leaves the tube dry. If paint drips or runs from the tube while you are spraying, or the pump keeps cycling with the trigger released and the tube is wet, the valve seat is leaking and the valve should be replaced.
What is the part number for a Graco prime valve?
Drain valve kit 235014 fits the 190, 210, 390 and RentalPro 210 sprayers and Magnum-class models such as the LTS 15 and LTS 17. The 490, 495, 595 and 650 PC sprayers use kit 239914, which includes the valve seat and seat gasket. Always confirm against the parts list for your model and series.
How tight should a Graco drain valve be?
Graco's repair manual for the 390-class sprayers gives 120 to 130 in-lb. The repair manual for Magnum-class LTS sprayers gives 130 to 180 in-lb. Use an inch-pound torque wrench, because the valve threads into an aluminum manifold that is easy to damage.
Can I clean a prime valve instead of replacing it?
Sometimes. If a flake of dried paint is holding the valve off its seat, removing the valve and rinsing the seat can stop the leak. If the seat is grooved or the leak comes back, replace the valve. The kit includes a new seat and gasket, which are the parts that wear.
Why does paint come out of the prime tube on my Magnum by itself?
On Magnum-class sprayers the Prime/Spray valve doubles as a pressure relief. If it opens on its own, the sprayer is building too much pressure, which Graco traces to a worn pressure control switch, pinched switch wires or a failed control board. Replacing the valve will not fix that.
Do I need to replace the handle and pin with the valve?
Not always. The handle, base and grooved pin are sold separately and can be reused if they are undamaged. Replace the handle if it is cracked or loose on the stem, and replace the pin if it is bent or no longer grips.