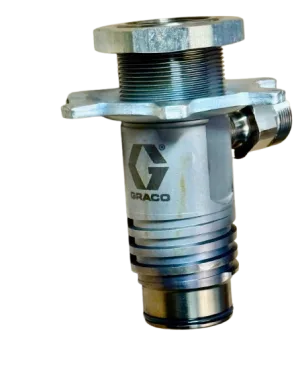
To change a Graco ProConnect pump, relieve pressure, knock the retaining nut loose with a hammer, swing the pump rod cover open, disconnect the outlet and suction hoses and slide the pump out of the drive housing. Fit the replacement in reverse: connect the outlet hose, line the pump rod up with the connecting rod, slide the pump fully in, close the cover flush, tighten the nut with both hands and then strike it a further 1/8 to 1/6 of a turn. Top up the TSL before you spray.
- A ProConnect pump is held by one large retaining nut and a hinged cover. There is no pump pin to drive out and no jam nut to torque.
- The only tool Graco calls for is a hammer, used to loosen the nut and to give it its final 1/8 to 1/6 turn.
- The pump rod must slide into the connecting rod as the pump goes in. If it does not, move the rod up or down by hand. Never force the pump.
- Swapping the pump gets you spraying again. Rebuild the worn one on the bench afterward with kit 18B260.
Downtime is the real cost of a worn pump. On older sprayers, pulling the pump meant driving out a pin, backing off a jam nut and unscrewing the pump from the drive housing, often with paint still in it. ProConnect changed that. The pump slides into the drive housing and is clamped by a single nut, so a spare pump can go on in the time it takes to stir a pail.
That speed only helps if the swap is done right. A cover that is not seated, or a nut that is only hand tight, can damage the drive housing. The steps below follow Graco's repair manual for the ProConnect Endurance pump.
1. When to Swap the Pump
A pump swap makes sense when the pump is clearly the fault and you cannot afford to stop.
Paint is leaking from the top of the pump
Paint collects in the wet cup around the piston rod and runs down the cylinder.
Meaning: the throat packings are worn. Tightening the packing nut can buy some time, as described in what to do when a pump leaks at the packing nut, but a repack is coming.
The pump will not stop when the gun is closed
The motor keeps running or restarts every few seconds with the trigger released, and the prime tube is dry.
Meaning: paint is slipping past the piston packings or a check valve. Confirm it with a stall test.
Pressure is low even with a new tip
The fan has tails and the pump seems to be working flat out.
Meaning: internal wear. Rule out the filters and the prime valve first.
Paint dried or froze in the pump
The motor hums or the status light shows a fault and the pump will not move.
Meaning: the pump is locked. Fit the spare and deal with the seized one on the bench.
If the sprayer still primes and holds pressure and simply has a stuck inlet ball, you do not need to swap anything. See how to clean a Graco intake valve.
2. Which ProConnect Pump You Have
Graco's manual for these pumps covers several model numbers, and the number is marked on the pump itself.
| Pump | Typical sprayers |
|---|---|
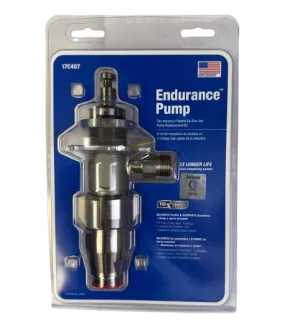
| 17C487 | 390 PC, 395 PC, 490 PC, 495 PC, 595 PC and related models |
| 17C721 | RentalPro 210PC, RentalPro 230PC HDR and related PC models |
| 17C488, 17C489 | Other ProConnect models covered by the same manual |
Always read the number off your own pump, or look your sprayer up in the parts list, because Graco fits different pumps to machines that look alike. Our breakdown pages for the 17C487 pump and the 17C721 pump show every internal part.
Should you carry a spare
For a one-sprayer crew, a spare pump is the cheapest insurance there is. A pump that fails at ten in the morning costs a full day if the nearest replacement is across town. With a spare on the truck, the same failure costs a coffee break.
3. Relieve Pressure the Way This Pump Manual Says
Engage the trigger lock. Turn the ON/OFF switch to OFF and wait about seven seconds for the power to dissipate, then unplug the cord. Remove the tip guard, turn the pressure control to its lowest setting, release the trigger lock and trigger the gun with a metal part of it held firmly against a grounded metal pail. Engage the lock again and open the prime valve. Leave the prime valve open until you are ready to spray.
If you can, flush the pump with water or the correct solvent before you take it off. It keeps paint out of the drive housing and makes the worn pump much easier to rebuild later.
4. Removing the Pump
- Loosen the retaining nut with a hammer
The pump is clamped by one large retaining nut at the base of the drive housing. Strike it with the hammer to break it loose. Graco's instructions call for exactly this, so no wrench is needed.
- Turn the nut until the cover is free
Spin the retaining nut by hand until the pump rod cover is released.
- Swing the pump rod cover open
The cover is hinged. Open it fully so you can see the top of the pump rod sitting in the connecting rod.
- Disconnect the outlet hose and the suction hose
Undo the outlet hose from the pump and pull the suction hose off the inlet. Have a rag ready for the paint left in them.
- Slide the pump out of the drive housing
Pull the pump straight out. The rod slips out of the connecting rod as it comes.
Stand the old pump upright in a pail of water if it has paint in it, so the paint does not harden before you get to the bench.
5. Installing the Replacement
- Connect the outlet hose to the new pump
Graco puts this first, because the fitting is easier to reach before the pump is in the housing.
- Line up the pump rod
Move the displacement rod up or down by hand until it will slide into the connecting rod as the pump goes into the drive housing.
- Slide the pump all the way in
Push the pump fully home. If it stops short, the rod is not lined up. Pull it back, adjust the rod and try again.
- Close the pump rod cover
Shut the cover and make certain it sits flush against the drive housing. A cover that is not flush will not clamp the pump.
- Tighten the retaining nut with both hands
Turn the nut as tight as you can get it by hand.
- Strike the nut a further 1/8 to 1/6 turn
Use the hammer to turn the retaining nut an additional 1/8 to 1/6 of a turn, which is 45 to 60 degrees.
- Install the suction hose
Push the suction hose back onto the inlet and check that the inlet strainer is clean.
It is tempting to give the nut a few extra blows for luck. Do not. Graco gives a range, and that range is what clamps the pump without overloading the housing. Mark the nut and the housing with a paint pen before the final strike if you want to see how far it has turned.
6. Before You Pull the Trigger Again
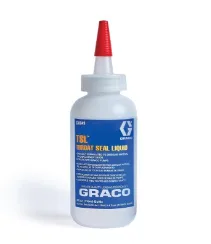
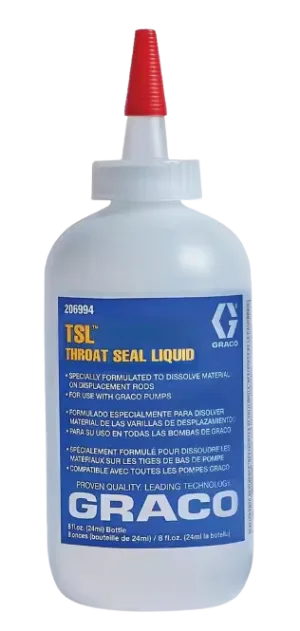
- Fill the TSL. Add Graco Throat Seal Liquid at the fill point so the packing nut reservoir is wet. TSL keeps paint from drying on the rod and wearing the new packings. It is sold as 238049 in a small bottle and 206994 in a larger one.
- Flush before paint. A pump that has been sitting on the shelf may have storage fluid in it. Prime with water or the right solvent first.
- Prime with the valve down and watch for a steady, bubble-free stream.
- Check stall. Turn to SPRAY, build pressure and release the trigger. The motor should stop and stay stopped.
- Look for leaks at the outlet fitting, the suction connection and around the retaining nut.
If the motor will not stop with the new pump fitted, the fault is elsewhere. Check the prime valve first, then the pressure control. Our guide to a Graco sprayer that will not shut off covers both.
7. Rebuilding the Pump You Took Off
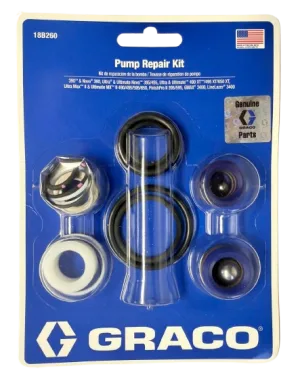
The worn pump is not scrap. In most cases it needs packings, and Graco sells them as kit 18B260, which replaces the earlier kit number 244194. The kit has the leather and V-Max packings for the throat and the piston, the glands, both check balls and the o-rings.
A few points from Graco's instructions are worth knowing before you start.
- Soak the leather packings in SAE 30W oil for one hour before assembly.
- Do not clean or wipe the piston valve threads. They carry a thread-locking patch. Graco warns that removing it can let the piston valve work loose in service.
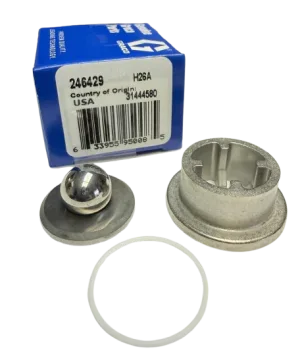
- Flip the intake seat. The carbide seat can be turned over and used on its other side, which gives a worn seat a second life. A new one comes in seat kit 246429.
- Use the torque figures. The piston valve is tightened to 27 ft-lb, the intake valve to 135 ft-lb and the packing nut to 75 in-lb, each with a small tolerance.
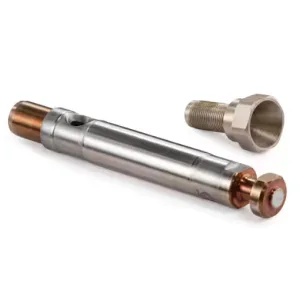
If the piston rod is scored or the cylinder is worn, packings alone will not last. The rod is 24W617 and the cylinder is 24W619 on the 17C487 family. Our step-by-step for the packings themselves is in how to replace packings on a Graco 390 or 395.
8. Mistakes to Avoid
- Forcing the pump in. If it will not slide home, the rod and connecting rod are not aligned.
- Leaving the cover proud. The cover must sit flush before the nut is tightened.
- Hand tight only. Without the final hammer turn, the nut can back off while the pump is working.
- Skipping the TSL. A dry packing nut shortens the life of new packings from the first hour.
- Fitting the wrong pump. Pumps for different sprayers look similar. Match the number.
9. Where This Applies
ProConnect pumps are fitted to the PC generation of Graco electric sprayers, including the 390 PC, 395 PC, 490 PC, 495 PC and 595 PC, and to the RentalPro PC models. Parts for these are in our 395 PC pump parts and 495 PC pump parts sections.
Older machines such as the 390 Classic, 190 and RentalPro 210 use a threaded pump held by a pin and a jam nut. That is a different procedure, covered in how to remove and install a Graco 246428 pump. The pump manuals themselves are in our manuals library.
Want a Spare Pump Ready Before the Next Breakdown?
Give us your sprayer model and we will confirm which ProConnect pump and repair kit it uses.
Ask Our Parts Team Call +1 713-931-4102ProConnect Pumps, Kits and TSL
 −28%
 −30%
10. Frequently Asked Questions
How long does it take to change a Graco ProConnect pump?
Once pressure is relieved, the swap itself takes a few minutes. You loosen one retaining nut, open the cover, disconnect two hoses and slide the pump out, then reverse the steps. Allow extra time to flush, prime and check for leaks.
What tools do I need to remove a ProConnect pump?
Graco's instructions call for a hammer, which is used to loosen the pump retaining nut and to give it its final turn on installation. Rags and a waste pail are useful for the paint left in the hoses.
How tight should the ProConnect pump retaining nut be?
Tighten it with both hands, then use a hammer to turn it an additional 1/8 to 1/6 of a turn, which is 45 to 60 degrees. Make sure the pump rod cover is flush against the drive housing before you tighten.
Why will my ProConnect pump not slide into the drive housing?
The pump rod is not lined up with the connecting rod. Pull the pump back, move the displacement rod up or down by hand, and slide the pump in again. Do not force it.
Can I rebuild a ProConnect pump instead of replacing it?
Yes. Kit 18B260, which replaces kit 244194, contains the packings, glands, check balls and o-rings for the 17C487 family. Many painters fit a spare pump on the job and rebuild the worn one later.
Do I need to add TSL after changing the pump?
Yes. Fill the packing nut area with Graco Throat Seal Liquid before spraying, and keep it topped up daily. It stops paint drying on the piston rod and extends packing life.