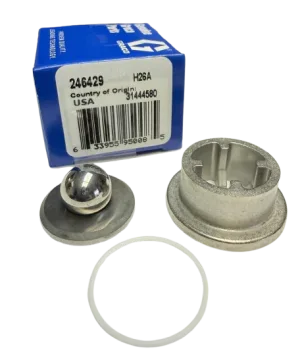
The intake valve at the bottom of a Graco pump is a ball that sits on a carbide seat, and when debris or wear stops it sealing, the pump is hard to prime and output drops. Relieve pressure, remove the suction tube, unscrew the intake valve housing from the pump cylinder and take out the ball guide, ball, seat and o-ring. Clean everything and inspect the ball and seat for nicks. Graco's manual says the seat may be flipped over and used on its other side. Refit with a new o-ring, or use seat kit 246429 on the 246428 and 17C487 pump families.
- A leaking intake valve shows up as hard priming, low output and a pump that will not stall.
- Clean first. Most intake problems are dried paint or a piece of debris on the seat.
- The carbide seat is reversible. Flipping it gives you a fresh sealing face for free.
- Always fit a new o-ring, and torque the housing. Each pump family has its own figure.
Every stroke of the pump depends on this one valve. On the upstroke the ball lifts and paint is drawn in. On the downstroke the ball drops onto its seat and seals, so the paint in the pump has nowhere to go but up through the piston and out to the hose.
If the ball does not lift, the pump cannot fill. If the ball does not seal, the downstroke pushes paint back into the pail. Both faults feel like a tired pump, and both are fixed in half an hour for the price of a small kit, or for nothing.
1. Signs of an Intake Valve Problem
The pump is difficult to prime
The motor runs and the pump strokes, but paint is slow to come or does not come at all.
Graco's chart: the intake valve is leaking. Clean it, and be sure the ball seat is not nicked or worn and that the ball seats well.
Output is low
The fan has tails with a good tip, and the sprayer cannot keep up.
Graco's chart: the intake valve ball and the piston ball are not seating properly. Remove the intake valve and clean it, and check the balls and seats for nicks.
The pump is packed with material
It worked yesterday. Today it strokes and delivers nothing.
Graco's chart: the intake valve ball is packed with material. Clean the intake valve.
The motor will not stop with the gun closed
It restarts every few seconds and the drain tube is dry.
Check: a leaking intake valve is one of the internal leaks that causes this. See a Graco sprayer that will not shut off.
Try this before you take anything apart
A ball that is simply stuck to its seat can often be freed in place. Take the suction tube off and gently push the ball up off the seat with a blunt tool, then prime with water. Our post on a Graco sprayer that will not prime covers the quick fixes. If the ball sticks again the next day, or it was never stuck and the valve simply leaks, carry on below.
2. Seat Kits by Pump
The intake valve parts are sold as a seat kit, and the kit depends on the pump.
| Pump | Typical sprayers | Carbide seat kit |
|---|---|---|
| 246428 | 390, 190 and 390 Classic, RentalPro 210, Ultra 395 to 595 | 246429 |
| 17C487, 17C721 and related ProConnect pumps | 390 PC to 595 PC, RentalPro PC | 246429 |
| 244195 | Ultra Max 695, Series A | 243190 |
| GH200 and GH230 pumps | Gas hydraulic sprayers | 240918 |
| GH130 pump 24B748 | GH130 | 244199 |
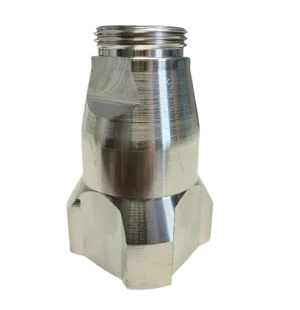
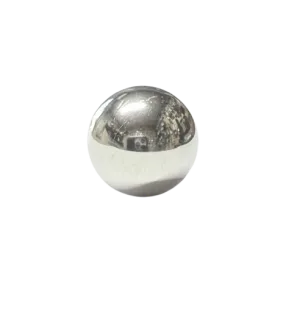
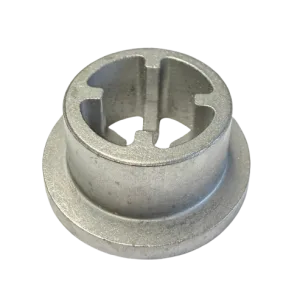
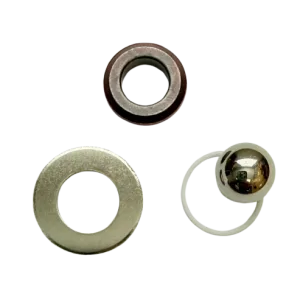
Kit 246429 includes the ball guide (15C011), the o-ring (15B112) and the 1/2 in. stainless ball (105445) along with the carbide seat. The intake housing itself is 15B611 on these pumps, and you only need one if the threads or the body are damaged.
Read the number off your own pump before ordering. Our breakdown pages for the 246428 pump and the 17C487 pump show every part in position.
3. Tools You Need
- A large wrench that fits the flats on the intake valve housing
- A second wrench or a vise with soft jaws to hold the pump cylinder
- A pick for the o-ring
- A soft brush and clean rags
- Grease for the new o-ring
- A torque wrench that reads in foot-pounds
- A pail of water or the correct flushing fluid
4. Relieve Pressure First
Engage the trigger lock, switch the sprayer OFF and unplug it. Turn the pressure control to its lowest setting, trigger the gun into a grounded metal pail, lock the trigger again and open the prime valve. Leave the prime valve open. Flush the pump first if it has paint in it, so the parts come out clean.
5. Taking the Intake Valve Apart
You can often do this with the pump still on the sprayer. If the housing is too tight to break loose that way, take the pump off and hold the cylinder in a vise. Pump removal is covered in how to change a ProConnect pump and how to remove and install a 246428 pump.
- Remove the suction tube
Loosen the nut or pull the suction hose off the pump inlet, and check the o-ring or washer in that connection while it is apart.
- Unscrew the intake valve from the cylinder
Hold the cylinder and turn the intake housing off the bottom of the pump. The ball and guide may drop out, so keep a hand or a rag underneath.
- Take the valve apart
Lift out the ball guide, the ball and the carbide seat. Graco notes that the o-ring may need a pick to get it out.
- Protect the machined faces
Graco's notice here is to take care with the pick so you do not damage the machined surfaces. A scratch across the o-ring groove is a new leak.
- Clean every part
Brush dried paint out of the housing, off the guide and off the ball. Wipe the seat until it shines.
- Inspect the ball and the seat
Look for nicks, flat spots and a worn ring on the seat where the ball lands. Roll the ball between your fingers. It should be smooth and perfectly round.
6. Putting It Back Together
- Flip the seat or fit a new one
If one face of the carbide seat is worn and the other is clean, turn it over. Graco's manual states that the seat may be flipped over and used on the other side. If both faces are marked, fit the new seat from the kit.
- Fit a new o-ring
Grease the new o-ring and seat it in its groove. Do not reuse the old one.
- Rebuild the valve
Place the seat, the ball and the ball guide in the housing in the order they came out.
- Thread the housing onto the cylinder
Start it by hand so it does not cross-thread.
- Torque the housing
On the ProConnect pump family Graco specifies 135 ft-lb, plus or minus 7. On the 246428 pump family the manual shows 60 ft-lb, plus or minus 5. Use the figure in the manual for your pump.
- Reconnect the suction tube and prime
Refit the suction tube, prime with water and check for leaks at the joint.
The seat is a carbide ring with a sealing edge on each side. Only the side facing the ball wears. Turning it over presents an unused edge. Mark the worn side with a paint pen so nobody flips it back.
7. The Other Ball: The Piston Valve
The pump has a second check valve inside the piston. If cleaning the intake valve does not restore output, this is the next suspect. Graco's chart mentions the piston ball alongside the intake ball, and says to check the piston valve seat for hardened paint or nicks.
Getting to it means taking the pump apart, which is the same work as a repack. Two cautions from Graco's manual apply.
- Do not clean or wipe the piston valve threads. They carry a thread locking and sealing patch. Removing it could let the piston valve come loose in operation.
- Torque the piston valve to 27 ft-lb, plus or minus 3, on the 246428 and 17C487 families.
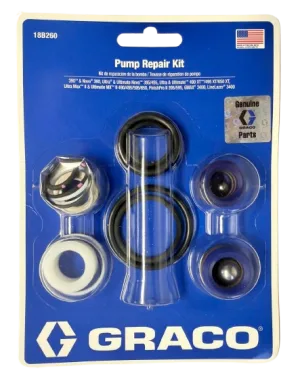
Because the pump is apart anyway, most people fit packing kit 18B260 at the same time. It includes both check balls. The method is in how to replace packings on a Graco 390 or 395.
8. Test the Repair
- Prime with water. The stream from the prime tube should be steady, with no bubbles.
- Turn to SPRAY, build pressure and release the trigger. The motor should stop and stay stopped.
- Spray a test pattern. The fan should be full, with no tails at normal pressure.
- Look at the joint between the intake housing and the cylinder. It should be dry.
If the pump still will not stall, work out whether the leak is at the valves or the packings with a stall test. If paint is collecting at the top of the pump, read what to do when a pump leaks at the packing nut.
9. Keeping the Intake Valve Clean
- Strain the paint. Graco's chart says it in as many words: strain paint before using to remove particles that could clog the pump.
- Keep the inlet strainer on. It is the last defense before the ball and seat.
- Flush until clear. Thinned paint left in the intake dries into a ring on the seat.
- Store with storage fluid. It stops the ball gluing itself to the seat. See our winterizing guide.
- Do not run the pump dry. The ball hammers a dry seat on every stroke.
Manuals for these pumps are in our manuals library, and filter choices that keep debris out of the pump are in our filter mesh guide.
Need the Right Seat Kit for Your Pump?
Read us the pump number and we will match the intake seat kit, ball and o-ring.
Ask Our Parts Team Call +1 713-931-4102Intake Valve Parts for Graco Contractor Pumps

 −30%
10. Frequently Asked Questions
How do I know if my Graco intake valve is bad?
The pump is difficult to prime, output is low, or the motor will not stop with the gun closed even though the drain tube is dry. Remove the intake valve and look at the ball and the carbide seat. Nicks, a flat spot on the ball or a worn ring on the seat mean it is leaking.
Can I flip the seat in a Graco intake valve?
Yes. Graco's pump repair manual states that the seat may be flipped over and used on the other side. Clean it thoroughly, turn the worn face away from the ball and fit a new o-ring.
What is Graco kit 246429?
It is the carbide seat kit for the intake valve on the 246428 pump and the 17C487 ProConnect pump family. Graco's parts list shows it includes the ball guide, the o-ring and the 1/2 in. stainless steel ball.
What torque does a Graco intake valve need?
It depends on the pump. Graco specifies 135 ft-lb, plus or minus 7, for the intake valve on ProConnect Endurance pumps, and its manual for the 246428 pump family shows 60 ft-lb, plus or minus 5. Check the manual for your pump.
Why is my Graco pump hard to prime?
Graco lists four causes: air in the pump or hose, a leaking intake valve, worn pump packings and paint that is too thick. Tighten the fluid connections and prime slowly, then clean the intake valve.
Do I have to remove the pump to clean the intake valve?
Not always. The intake housing unscrews from the bottom of the pump cylinder, and it can often be removed with the pump on the sprayer. If it is too tight, remove the pump and hold the cylinder securely.