To remove a Graco 246428 pump, relieve pressure, take off the pump rod cover, disconnect the suction tube and hose, jog the pump until the pin is reachable, unplug the sprayer, push the retaining spring up and push the pump pin out, then loosen the jam nut and unscrew the pump. To install, grease the rod, pin it to the connecting rod with the retaining spring in its groove, thread the pump in until it is flush with the top of the drive housing opening, point the outlet to the back, and tighten the jam nut by hand plus 1/8 to 1/4 turn with a hammer of 20 oz or less, about 75 ft-lb. Fill the packing nut with TSL.
- Two parts hold this pump: a pin through the connecting rod, kept in place by a retaining spring, and a jam nut that locks the pump threads.
- Unplug before you touch the pin. You jog the pump to bring the pin into reach, then cut the power.
- The retaining spring must sit in its groove all the way round. Graco warns that a loose pin can throw parts.
- The jam nut is tightened with a light hammer, not a big one: hand tight, then 1/8 to 1/4 turn, roughly 75 ft-lb.
Before Graco introduced the ProConnect system, its electric sprayers used a pump that threads into the drive housing. The 246428 Endurance pump is the best known of them. It is fitted to the 390, the 190 and 390 Classic, the RentalPro 210 and 230ES, and a long list of other machines.
Taking it off is not difficult, but it is a mechanical connection that carries the full force of the pump stroke. The pin joins the pump rod to the connecting rod. The jam nut stops the pump unscrewing. Both have to be right when it goes back.
1. When You Need to Pull the Pump
You are repacking it
Paint leaks at the packing nut, or the hour meter on a rental unit is flashing SVC.
Then: the pump comes off for a packing kit. If you are not there yet, see what to do when a pump leaks at the packing nut.
Paint dried or froze inside
The motor will not turn the pump.
Then: Graco's chart says to thaw a frozen sprayer fully before starting it, and to replace the packings if paint has hardened in the pump.
The motor runs but the pump does not stroke
The fan spins and nothing moves below.
Check: the pump pin first. Graco lists a missing or damaged pin, then the connecting rod, then the gears. The gear side is in how to replace a Graco drive housing.
You are fitting a new pump
The rod or cylinder is scored and a repack will not last.
Then: swap the whole pump.
2. Sprayers That Use the 246428
Graco's pump manual lists the 246428 for a wide range of sprayers. The main ones are:
- 390 Series A, 390 Classic, 290 Classic and 190 Classic
- 190ES Plus and 210ES Plus
- RentalPro 210 and RentalPro 230ES
- Ultra 395, 495 and 595, ST Max 395, 495 and 595, and Ultra Max II 490, 495 and 595
- FinishPro 390 and 395
- GMAX 3400 and LineLazer 3400, Series A
The steps below are from the repair manual for the 390-class chassis used by the RentalPro 210. Larger frames mount the pump the same way, but the covers and fittings differ, so keep your own manual open. You will find it in our manuals library, and the pump's parts are on the 246428 pump breakdown page.
3. Tools and Supplies
- A screwdriver or nut driver for the pump rod cover screws
- Wrenches for the suction tube nut and the hose nut
- A hammer weighing no more than 20 oz
- A punch or screwdriver for the retaining spring
- Grease for the top of the pump rod
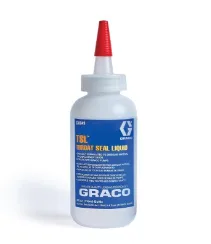
- Throat Seal Liquid, 238049
- Rags and a waste pail
4. Relieve Pressure
Carry out the pressure relief procedure: trigger lock on, pressure to minimum, trigger the gun into a pail, and open the prime valve. Leave the prime valve open. Flush the pump with water or the correct solvent if you can. You will need the power briefly in step 4, to jog the pump, and after that the cord comes out of the wall and stays out.
5. Removing the Pump
- Relieve pressure
As above. Do not skip it because the sprayer has been sitting.
- Remove the pump rod cover
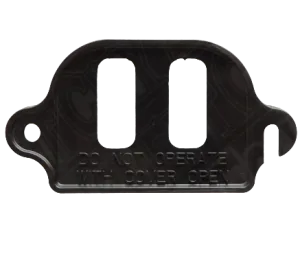
Loosen the two screws and lift the cover off the front of the drive housing.
- Disconnect the suction tube and the hose
Loosen the nut and remove the suction tube. Loosen the nut on the short hose that runs from the pump to the manifold and remove it.
- Jog the pump until the pin is in reach
Switch the sprayer on briefly and cycle the pump until the pump pin sits where you can get at it. Keep fingers clear of the moving rod.
- Unplug the power cord
From here on the sprayer must be dead.
- Push the retaining spring up and push the pin out
The spring wraps around the connecting rod and covers the ends of the pin. Slide it up out of the way, then push the pin through.
- Loosen the jam nut and unscrew the pump
Break the jam nut loose, then turn the whole pump out of the drive housing.
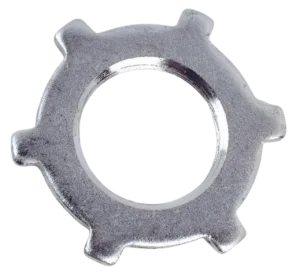
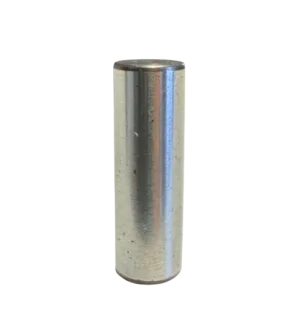
Keep the pin and the spring together. If the pin is worn or the spring is stretched, replace them. The pin is 196762 and the jam nut is 195150.
6. Installing the Pump
- Extend the rod and grease it
Pull the pump's piston rod fully out. Apply grease to the top of the rod where it enters the connecting rod.
- Thread the jam nut onto the pump
Run the jam nut down onto the pump threads before the pump goes in.
- Insert the rod into the connecting rod
Lift the pump so the top of the rod slides into the connecting rod.
- Fit the pin and seat the spring
Push the pump pin through. Slide the retaining spring down and check that it is in its groove over the pin all the way round.
- Push the pump up and start the threads
Raise the pump until its threads engage the drive housing.
- Screw the pump in until it is flush
Turn it in until the pump threads are flush with the top of the drive housing opening.
- Point the outlet to the back
Align the pump outlet so it faces the rear, toward the hose.
- Tighten the jam nut
Screw the jam nut up against the housing until it stops. Tighten it by hand, then tap it 1/8 to 1/4 of a turn with a hammer of 20 oz at most. Graco gives this as approximately 75 ft-lb (102 N.m).
- Reconnect the suction tube and the hose
Fit the suction tube and the hose and tighten both nuts.
- Refit the pump rod cover
Install the cover with its two screws.
- Fill the packing nut with TSL
Add Graco Throat Seal Liquid until the fluid flows onto the top of the seal.
Graco's warning is direct: if the pump pin works loose, parts could break off from the force of the pumping action and be thrown, causing serious injury or property damage. Make sure the retaining spring is properly installed before the cover goes back on.
Graco's notice for this chassis says that if the pump jam nut loosens during operation, the threads of the drive housing will be damaged. That turns a pump job into a drive housing job. Tighten it as specified and check it during the first hour of spraying.
7. Checks Before You Spray
- Prime with water, valve down, and look for a steady stream with no bubbles.
- Turn to SPRAY, build pressure and release the trigger. The motor should stop and stay stopped.
- Look at the hose nut, the suction connection and the packing nut for leaks.
- Listen. A knock on each stroke means the pin or the spring is not seated. Stop and check.
- After the first hour, recheck the jam nut and top up the TSL.
If the pump will not prime after it has been apart, the intake ball may be stuck or the suction tube nut may be drawing air. Check the o-ring on the suction tube and see how to clean or replace a Graco intake valve.
8. Repack or Replace
With the pump on the bench you have a choice to make.
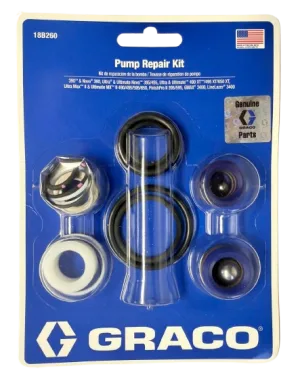
- Repack if the rod is smooth and the cylinder is not scored. Kit 18B260, which replaces the older number 244194, has the packings, glands, check balls and o-rings. The method is in how to replace packings on a Graco 390 or 395.
- Replace if you can feel a step on the rod with a fingernail, or if the pump has already been repacked more than once and leaks again quickly. A complete 246428 pump goes on in the same time.
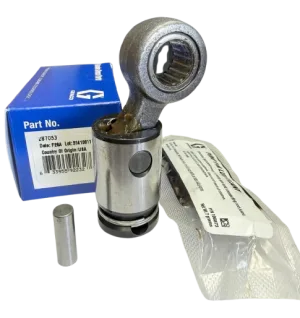
Either way, look at the connecting rod while the pump is off. If the hole for the pin has worn oval, or the rod is bent, fit a new connecting rod kit (287053). A damaged connecting rod is one of the causes Graco lists when the motor runs and the pump does not stroke.
9. Mistakes to Avoid
- Driving the pin out with the cord plugged in. Unplug after you jog the pump, every time.
- Leaving the spring on top of the pin's edge. It must drop into its groove.
- Screwing the pump in too far or not far enough. Flush with the top of the drive housing opening is the mark.
- Using a heavy hammer on the jam nut. Graco limits it to 20 oz for a reason.
- Forgetting the TSL. A dry packing nut starts wearing new packings on the first stroke.
- Forgetting the pump rod cover. It keeps fingers and rags away from the moving rod.
10. Related Repairs
If your sprayer is a PC model with a hinged pump door and one large retaining nut, it has a ProConnect pump and none of this applies. See how to change a ProConnect pump. For a 390-class sprayer that will not run at all, start with Graco 390 motor will not run.
Parts for these machines are in our Graco 390 parts, 190 Express parts and RentalPro parts sections.
Replacing the Pump or Just Repacking It?
Tell us your sprayer model and what the pump is doing, and we will help you choose between a new pump and a packing kit.
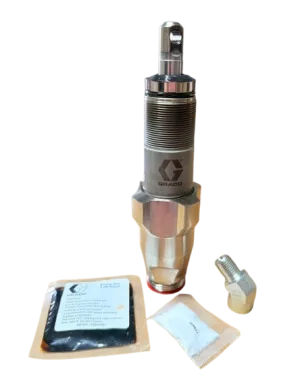
Ask Our Parts Team Call +1 713-931-4102246428 Pump and Mounting Parts
 −30%
11. Frequently Asked Questions
How do I remove the pump from a Graco 390?
Relieve pressure, remove the pump rod cover, and disconnect the suction tube and the hose. Cycle the pump until the pin is reachable, then unplug the sprayer. Push the retaining spring up, push the pump pin out, loosen the jam nut and unscrew the pump from the drive housing.
How tight should the jam nut be on a Graco 246428 pump?
Screw the jam nut up until it stops and tighten it by hand. Then tap it 1/8 to 1/4 of a turn with a hammer of 20 oz maximum. Graco gives that as approximately 75 ft-lb, or 102 N.m.
How far do I screw the pump into the drive housing?
Thread it in until the pump threads are flush with the top of the drive housing opening, then turn it so the pump outlet faces the back before you tighten the jam nut.
What holds the pump pin in place on a Graco sprayer?
A retaining spring that sits in a groove around the connecting rod and covers the pin. It must be fully in the groove. Graco warns that a pin that works loose can cause parts to break off and be thrown.
Do I need to add TSL after reinstalling the pump?
Yes. Fill the packing nut with Graco Throat Seal Liquid until the fluid flows onto the top of the seal, and keep it topped up each day you spray.
Can I replace a 246428 pump with a ProConnect pump?
Not as a direct swap. ProConnect pumps mount in a different drive housing with a hinged cover and a single retaining nut. Use the pump listed for your sprayer's model and series.