Paint collecting around the piston rod at the top of a Graco pump means the throat packings have worn, and Graco allows one adjustment before a repack. Relieve pressure, remove the throat nut spacer if your pump has one, and tighten the packing nut only until the leak stops or slows. Graco says this gives roughly 100 more gallons of spraying before the packings must be replaced. Do not overtighten: a nut that is too tight grips the rod, overheats the motor and ruins the packings. Then refill the nut with Throat Seal Liquid.
- A leak at the top of the pump is throat packing wear. It is normal wear, and Graco gives a procedure for it.
- The adjustment is a one-time extension of about 100 gallons, not a repair. Order the packing kit when you make it.
- Tighten just enough to stop the leak. Overtightening is the most common way this job goes wrong.
- Keep the packing nut full of TSL. A dry rod drags paint into the packings and wears them quickly.
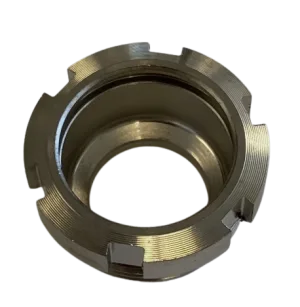
Every Graco piston pump has two sets of packings. The lower set rides on the piston and does the pumping. The upper set, the throat packings, seals around the rod where it leaves the pump. Above them sits the packing nut, which is also the small reservoir you fill with Throat Seal Liquid.
The throat packings are V-shaped rings stacked together. As they wear they lose their grip on the rod, and paint begins to creep up past them. The nut presses down on the stack, so tightening it squeezes the rings back against the rod. That is the adjustment, and it works once.
1. Is This Leak the Throat Packings
Paint in the wet cup
The TSL in the packing nut turns the color of the paint, or paint pools around the rod.
Meaning: paint is passing the throat packings. This is the leak the adjustment is meant for.
Paint running down the outside of the pump
Streaks down the cylinder below the packing nut.
Meaning: the leak has been going on for a while. Adjust now and plan the repack.
Paint leaking at the bottom of the pump
Wet around the intake valve or the suction connection.
Not the packings: check the intake valve o-ring and the suction tube connection. See how to service a Graco intake valve.
Hour meter flashing SVC
On rental sprayers with an hour meter, the hours and SVC flash in turn.
Meaning: 40 hours of motor run time have passed. Graco's chart for the RentalPro says to replace the pump packings.
A little discoloration in the TSL after a long day is normal. A wet cup that fills with paint within an hour is not.
2. Why You Should Not Ignore It
A throat leak looks harmless, because the sprayer still sprays. It is worth dealing with the day you see it for three reasons.
- Paint dries on the rod. Dried paint is abrasive. Each stroke then drags that grit through the packings and scores the rod. A scored rod eats new packings, so a cheap repack turns into a rod and packings.
- Paint reaches places it should not. On small sprayers, Graco warns that a leaking pump should be dealt with at the first sign, because further damage to the drive train can follow.
- It only gets worse. Packings do not heal. The leak you can live with today is a stream next week.
3. Before You Put a Tool on the Pump
Engage the trigger lock, switch the sprayer off and unplug it. Turn the pressure control to minimum, trigger the gun into a grounded metal pail, lock the trigger again and open the prime valve. Leave the prime valve open while you work. The pump stays pressurized until you release it by hand, and fluid at spraying pressure can inject through skin.
Wipe the top of the pump clean before you start, so you can see whether the leak has stopped afterward.
4. Adjusting the Packing Nut
- Clean out the wet cup
Soak up the paint and old TSL in the packing nut with a rag so the nut and rod are clean.
- Remove the throat nut spacer
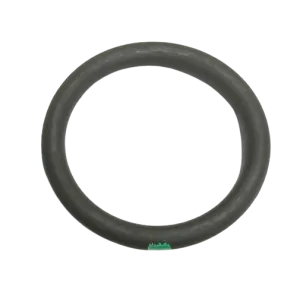
Many Graco pumps have a spacer under the packing nut that sets its position when the pump is new. On current pumps it is an o-ring, and on older pumps a clip ring. Graco's pump manual says to remove it when the packings begin to leak after much use, which lets the nut travel further down. The same manual adds that where the spacer is an o-ring, the nut can be tightened without taking the o-ring off.
- Tighten the nut a little at a time
Turn the packing nut clockwise in small steps, a fraction of a turn each time. Go gently. You are closing up a stack of soft rings, not torquing a bolt.
- Stop when the leak stops or slows
Graco's wording is to tighten until leakage stops or lessens. That is the whole specification. There is no torque value for this adjustment, and going further does harm.
- Refill with TSL
Fill the packing nut with Throat Seal Liquid.
- Run the pump and watch
Prime with water, bring the sprayer up to pressure and watch the nut for a few minutes. Give it another small turn only if paint is still rising.
Graco's troubleshooting charts are clear on this. A packing nut that is too tight clamps the packings on the rod, restricts the pump and damages the packings. The motor has to fight the drag, so it runs hot and the sprayer may run for five or ten minutes and then stop. If your sprayer started cutting out after a packing adjustment, back the nut off.
How much life does the adjustment buy
Graco puts it at approximately 100 gallons of additional operation before a repacking is required. Treat that as a planning figure. Abrasive coatings, a scored rod or a dry packing nut will shorten it. The sensible move is to order the packing kit the same day you adjust the nut, so it is on the shelf when the leak returns.
5. Throat Seal Liquid Is Part of the Fix
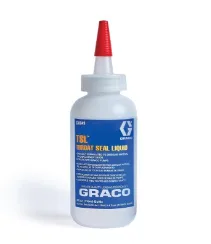
TSL is the oil you pour into the packing nut. It keeps the rod wet where it passes through the throat packings, so paint cannot dry on the rod and be dragged back through them. Graco's maintenance tables list filling the TSL as a daily job, and its gas sprayer manual explains why: it helps prevent fluid buildup on the piston rod, premature packing wear and pump corrosion.
- Top it up every day you spray.
- After fitting or refitting a pump, fill the nut until the liquid flows onto the top of the seal.
- If the TSL turns to paint within an hour or two, the packings are past adjusting.
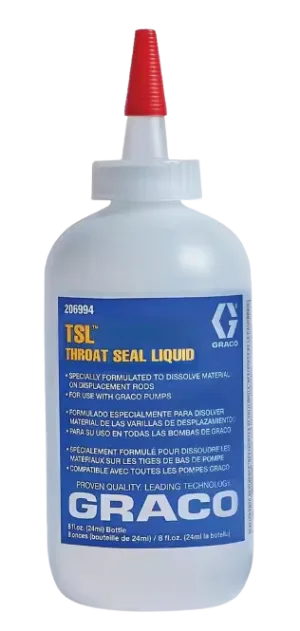
TSL comes as 238049 in a 4 oz bottle and 206994 in a larger one. It is not the same product as storage fluid. Our post on TSL versus Pump Armor explains which goes where.
6. When the Leak Comes Back: Repacking
Once the nut has been adjusted and the leak returns, the packings are finished. You have two routes.
Repack the pump
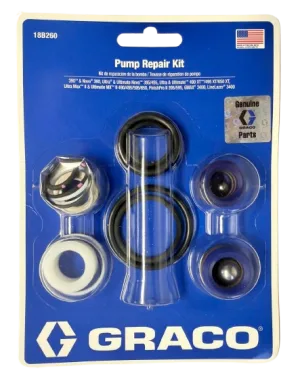
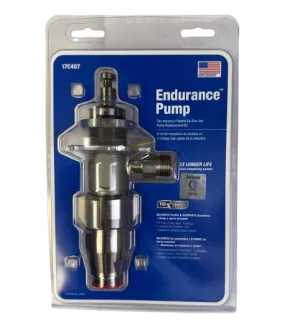
Kit 18B260, which replaces the earlier number 244194, holds the throat and piston packings, the glands, both check balls and the o-rings for the common 246428 and 17C487 pump families. A few points from Graco's instructions:
- Soak the leather packings in SAE 30W oil for an hour before you assemble.
- Do not clean or wipe the threads of the piston valve. They carry a locking patch that must stay.
- After assembly the packing nut is tightened to 75 in-lb, or half a turn past hand tight. That figure is for a fresh repack, not for the adjustment described above.
The procedure is laid out in how to replace packings on a Graco 390 or 395, and the wider range of kits is in our guide to Graco o-rings, seals and packing kits.
Swap the pump
If you cannot stop work, fit a spare pump and repack the worn one later. On PC sprayers that takes minutes: see how to change a ProConnect pump. On older machines with a threaded pump, see how to remove and install a 246428 pump. Complete pumps include 17C487 and 246428.
Look at the rod while it is apart
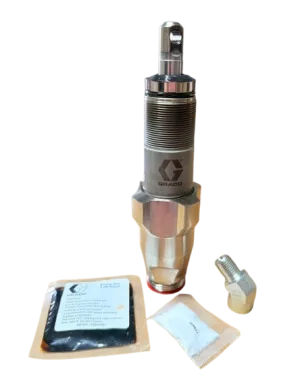
Run a fingernail along the piston rod where the throat packings ride. If you can feel a step or a groove, new packings will leak again quickly. Graco lists a worn or damaged displacement rod as a cause of excessive leakage into the packing nut, and the fix is a new rod.
7. The Same Leak on Other Graco Sprayers
Gas hydraulic sprayers
On GH models the part is called the wet cup. Graco's chart says that if paint leaks and runs over the side of the wet cup, tighten the wet cup just enough to stop the leak, and replace the throat packings if that does not hold. The repack is in how to repack a GH200 or GH230 pump.
Magnum-class sprayers
Small Magnum pumps have no packing nut to adjust. When paint leaks down the outside of the pump, the packings are worn and the pump is replaced. See Magnum pump leaking: when to replace it.
8. Making Packings Last Longer
- Keep the TSL topped up. It is the cheapest protection the pump has.
- Flush thoroughly. Paint left in the pump dries on the rod overnight.
- Store with storage fluid. It keeps the packings from drying out between jobs.
- Strain the paint. Grit wears rods, packings and valve seats alike.
- Never run the pump dry. A dry pump heats the packings fast.
- Do not tighten the nut "just in case." If it is not leaking, leave it alone.
Leak Came Back After the Adjustment?
Tell us the pump number on your sprayer and we will match the packing kit, and the rod and cylinder if they are worn.
Ask Our Parts Team Call +1 713-931-4102Packing Kits, Packing Nut and TSL
 −30%
 −28%
9. Frequently Asked Questions
Why is paint leaking from the top of my Graco pump?
The throat packings that seal around the piston rod have worn, so paint passes them and collects in the packing nut. Graco's procedure is to tighten the packing nut until the leak stops or lessens, which gives roughly 100 more gallons before the packings need replacing.
How tight should a Graco packing nut be?
For a leak adjustment, tighten only until the leakage stops or slows. There is no torque figure for the adjustment. After a full repack, Graco specifies 75 in-lb, or half a turn past hand tight, on the 246428 and 17C487 pump families.
What happens if I overtighten the packing nut?
The packings clamp the rod, which restricts the pump and damages the packings. The motor overheats from the extra load, and the sprayer may run for five to ten minutes and then stop. Loosen the nut and check for leaks.
What is the spacer under the Graco packing nut?
It is a throat nut spacer that sets the nut position on a new pump. It is an o-ring on current pumps and a clip ring on older ones. Graco says to remove it when the packings begin to leak after much use, so the nut can be tightened further.
Do I need TSL in the packing nut?
Yes. Throat Seal Liquid keeps the piston rod wet so paint does not dry on it and get dragged through the packings. Graco lists filling the TSL as a daily maintenance task.
Which packing kit fits a Graco 390 or 395 pump?
Kit 18B260, which replaces kit 244194, covers the 246428 pump on 390 Classic and similar sprayers and the 17C487 ProConnect family on PC models. Confirm the pump number on your sprayer before ordering.